Unlocking Crystal-Clear Audio: Your Speaker Wire Color Guide
Are you tired of muffled sound or frustrating buzzing from your speakers? The secret to crisp, clear audio might be simpler than you think: understanding your speaker wire colors. A seemingly minor detail, correctly connecting your speaker wires can dramatically improve your listening experience. This guide will delve into the intricacies of speaker wire color codes, helping you unlock the full potential of your audio system.
Speaker wire color conventions provide a standardized method for identifying the positive and negative terminals of your speakers and amplifier. This ensures correct polarity, which is essential for proper sound reproduction. While the concept may appear simple, misinterpreting these color codes can lead to out-of-phase audio, resulting in a weakened soundstage and diminished bass response.
The history of speaker wire color codes is intertwined with the development of audio technology itself. As stereo systems became popular, the need for a simple, universal method for connecting speakers arose. While different regional and manufacturer variations exist, the underlying principle of distinct colors for positive and negative connections remains consistent. This seemingly simple system has played a crucial role in enabling clear and accurate audio reproduction across countless devices.
The primary issue related to speaker wire identification is the variation in color coding. While there are generally accepted standards, variations can occur. This can lead to confusion, especially when dealing with older equipment or wiring installed by previous owners. Understanding these potential variations is crucial for avoiding incorrect connections and ensuring optimal sound quality.
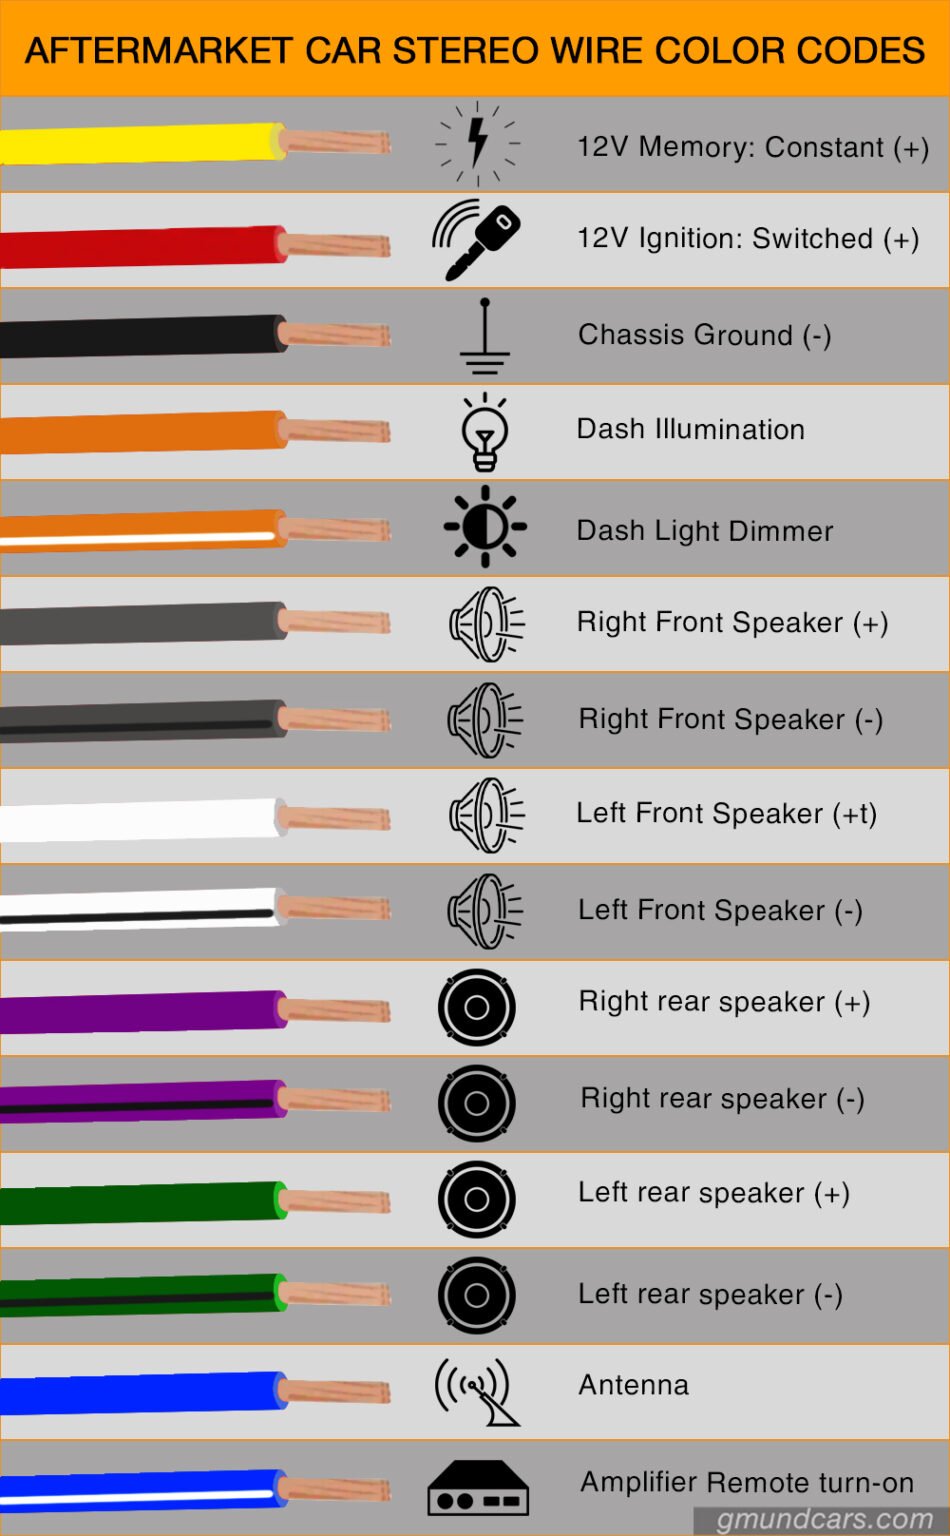
In most cases, you will encounter two-wire speaker cables. One wire will be marked with a stripe, ridge, or different color, indicating the positive (+) connection. The unmarked wire is typically the negative (-) connection. Copper wire is frequently used, though some high-end cables utilize silver or other materials for enhanced conductivity. For example, a common configuration uses red for positive and black for negative. However, other combinations exist, including white/black, or even transparent insulation with a single colored wire inside.
Using a speaker wire color guide offers several benefits. Firstly, it guarantees correct polarity, ensuring optimal sound quality. Secondly, it simplifies the connection process, reducing the risk of errors and frustration. Lastly, understanding these codes can help troubleshoot audio issues and diagnose potential problems with your setup.
To ensure a seamless connection, follow these steps: First, identify the positive and negative terminals on both your amplifier and speakers. Second, consult your speaker wire color code chart if necessary. Third, connect the positive wire from the amplifier to the positive terminal on the speaker, and repeat for the negative connection. Finally, test your system to confirm proper audio output.
Use this checklist before connecting your speakers: (1) Identify positive and negative terminals. (2) Check wire color codes. (3) Connect positive to positive, negative to negative. (4) Test audio output.
Here's a step-by-step guide for hooking up your speakers. 1. Turn off your amplifier. 2. Strip the insulation from the ends of your speaker wire. 3. Identify positive and negative wires. 4. Connect the wires to your amplifier and speaker terminals, ensuring correct polarity. 5. Test the sound.
Advantages and Disadvantages of Standardized Speaker Wire Colors
| Advantages | Disadvantages |
|---|---|
| Simplified connection process | Variations in standards can cause confusion |
| Ensures correct polarity | Not always foolproof, requires user diligence |
| Easier troubleshooting |
Best Practices: 1. Always double-check polarity. 2. Use high-quality speaker wire. 3. Secure connections to prevent shorts. 4. Avoid twisting wires together excessively. 5. Label wires for future reference.
Real Examples: 1. Connecting a home theater system. 2. Wiring car speakers. 3. Setting up a PA system. 4. Connecting studio monitors. 5. Wiring outdoor speakers.
Challenges and Solutions: 1. Mismatched colors – consult a chart. 2. Damaged wires – replace them. 3. No markings – use a multimeter. 4. Humming sound – check grounding. 5. Weak signal – check amplifier settings.
FAQs: 1. What if my wires aren't marked? - Use a multimeter. 2. Does wire gauge matter? - Yes, for longer runs. 3. Can I use regular electrical wire? - No, it's not designed for audio signals. 4. What if my speakers are out of phase? - Swap the connections on one speaker. 5. How can I improve sound quality? - Use high-quality cables. 6. What do I do if I have a humming sound? - Check for grounding issues. 7. How do I connect multiple speakers? - Consult your amplifier's manual. 8. What if my sound is distorted? - Check amplifier settings and cable connections.
Tips and Tricks: When stripping wire, avoid damaging the copper strands. Use banana plugs for easier connections. Label your wires clearly to prevent future confusion. Always consult your equipment manuals for specific instructions.
In conclusion, mastering the nuances of speaker wire color codes is fundamental to achieving high-fidelity audio. Understanding these seemingly small details can significantly enhance your listening experience, transforming muddled sounds into crisp, clear audio. By following the steps and guidelines outlined in this comprehensive speaker wire color guide, you can avoid common pitfalls, ensure proper polarity, and unlock the full potential of your audio system. Take the time to familiarize yourself with these principles and enjoy the rewards of a truly immersive and vibrant soundstage. Don't settle for less – take control of your audio experience today!
Dive into the world of marry my husband manga downloads drama and more
Unlocking the icon of the seas your ultimate guide to cruise pricing
Unlocking your interior design vision with behrs online paint tool


