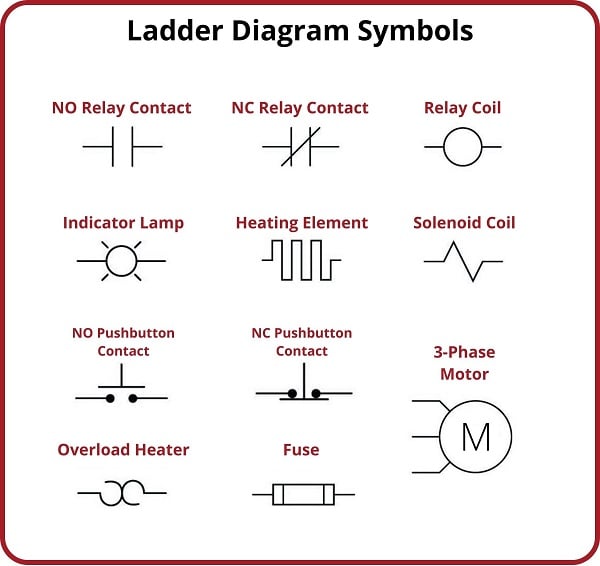
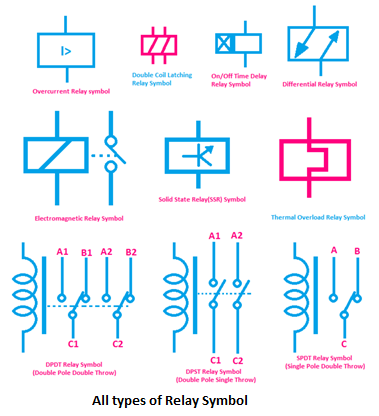
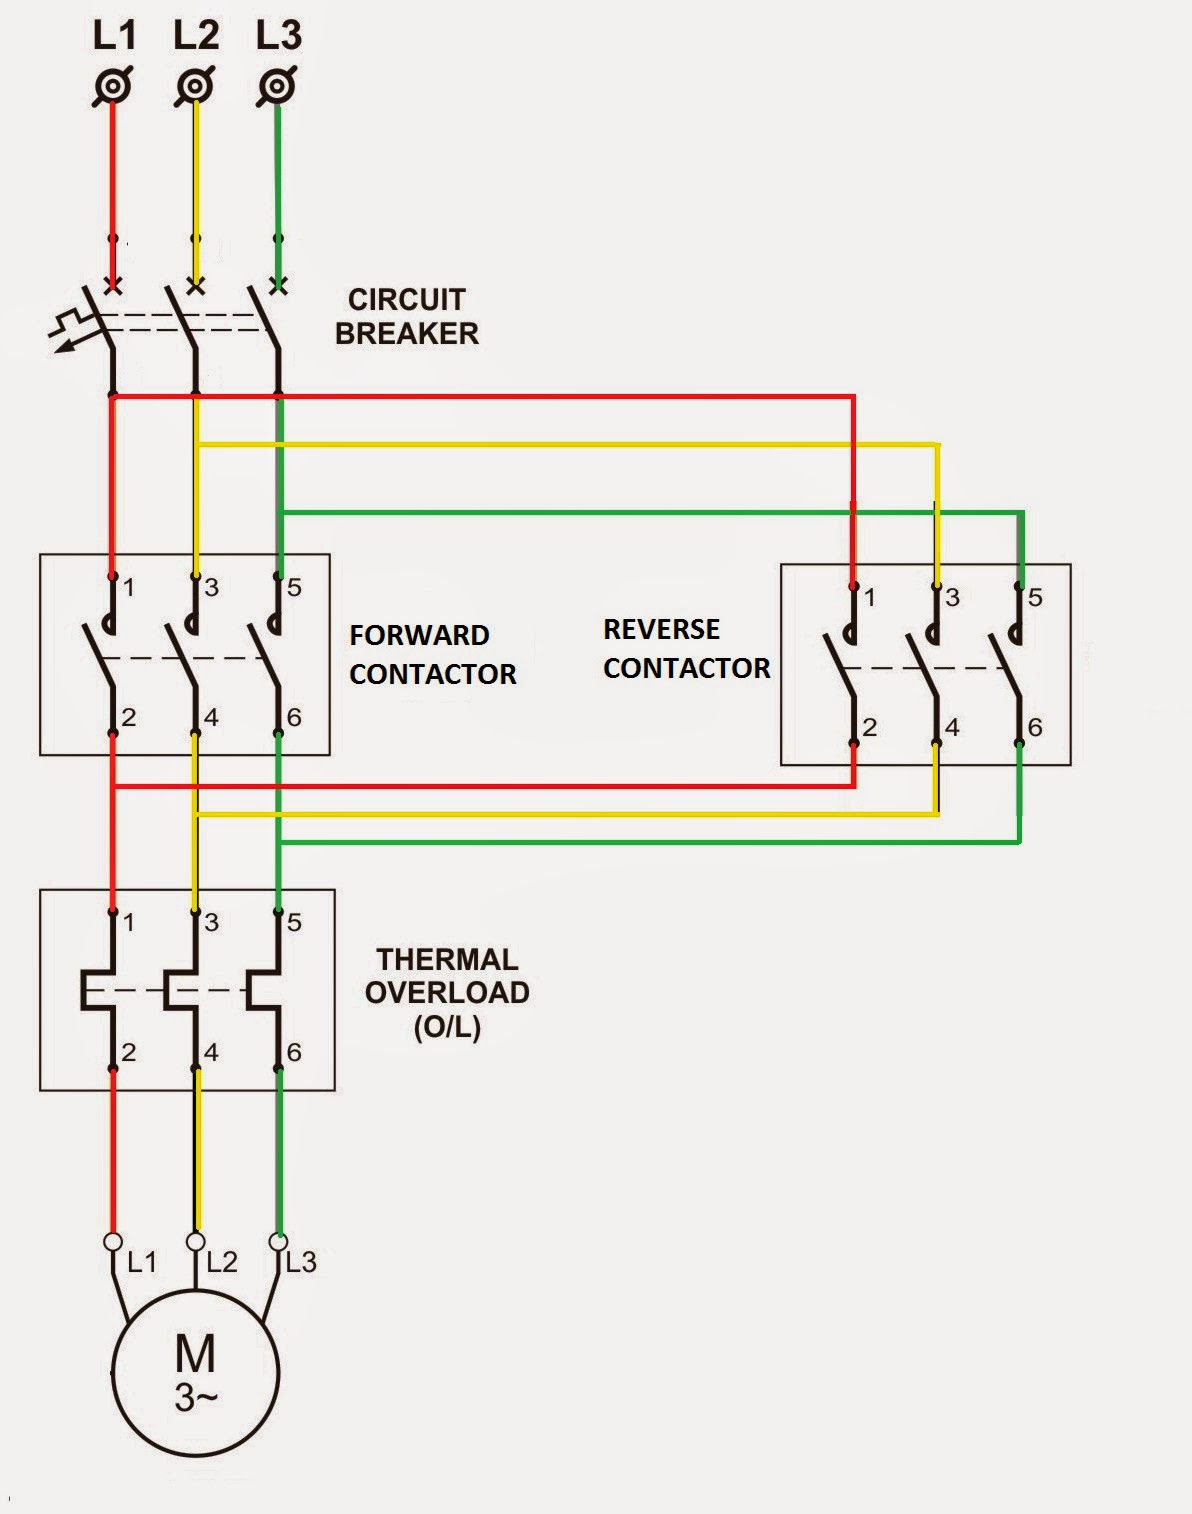
Decoding the Secrets of Thermal Overload Relay Symbols
Ever stared at a thermal overload relay, puzzled by the cryptic markings? You're not alone. These seemingly small symbols hold the key to understanding the relay's functionality and ensuring proper motor protection. Deciphering them is less about arcane knowledge and more about grasping a standardized language.
Thermal overload relays (OLRs) are essential for preventing motor burnout. They act as a safeguard, tripping the circuit when the motor draws excessive current, often due to overload or a single-phasing condition. But how do you know what a particular relay is capable of? That's where NEMA (National Electrical Manufacturers Association) symbols come into play.
These symbols, standardized by NEMA, provide a concise visual representation of the relay's characteristics, including trip class, reset type, and other crucial operating parameters. Understanding these markings is essential for selecting the right relay for your specific application and ensuring the longevity of your motor.
Imagine trying to assemble furniture without instructions. Similarly, choosing an OLR without understanding its NEMA symbols is a recipe for potential disaster. From preventing costly motor replacements to minimizing downtime, the benefits of understanding these symbols are significant.
This guide will delve into the world of NEMA symbols for thermal overload relays, providing you with the knowledge to confidently interpret these markings and select the right protection for your motor. We'll cover everything from the basics of trip classes to advanced features like manual-automatic resets and ambient temperature compensation.
NEMA standards have played a crucial role in the electrical industry for decades, ensuring interoperability and safety. The standardization of overload relay symbols is a key aspect of this, allowing engineers and technicians to quickly identify a relay's characteristics regardless of the manufacturer. Early overload relays lacked this standardized symbology, leading to confusion and potential misapplication. The development of NEMA standards streamlined the process, ensuring clarity and consistency across the industry.
One of the main issues surrounding NEMA symbols is the potential for misinterpretation. Without proper training, it’s easy to overlook subtle differences between symbols. This underscores the importance of consulting manufacturer datasheets and seeking expert advice when selecting overload relays.
The trip class of an overload relay, indicated by a specific symbol, defines how quickly the relay trips in response to an overcurrent condition. Common trip classes include 10, 20, and 30, each with its own response curve. For instance, a Class 10 relay is designed to trip faster than a Class 30 relay for the same level of overcurrent.
Benefits of understanding NEMA symbols: 1. Proper motor protection: Selecting the correct trip class ensures the motor is protected from damage due to overload. 2. Reduced downtime: Quickly identifying the cause of a tripped relay through its symbols minimizes troubleshooting time. 3. Enhanced safety: Properly selected relays prevent motor burnout, which can lead to fire hazards.
If you encounter an unfamiliar NEMA symbol on a thermal overload relay, consult the manufacturer's datasheet. This document provides a comprehensive explanation of the relay's features and specifications, including the meaning of all symbols used.
Advantages and Disadvantages of Standardized NEMA Symbols
| Advantages | Disadvantages |
|---|---|
| Clear and concise representation of relay characteristics | Requires some training and familiarity to interpret correctly |
| Standardized across manufacturers, promoting interoperability | Subtle variations between symbols can be confusing |
| Facilitates quick identification of relay features | Not all manufacturers strictly adhere to NEMA standards |
Best Practices: 1. Always consult the manufacturer's datasheet. 2. Ensure the chosen relay matches the motor's full-load current rating. 3. Regularly inspect overload relays for signs of wear and tear. 4. Understand the difference between manual and automatic resets. 5. Consider ambient temperature compensation when selecting a relay for extreme environments.
Challenges: 1. Difficulty interpreting complex symbols. Solution: Refer to NEMA standards documentation. 2. Variations in symbol representation between manufacturers. Solution: Consult individual manufacturer datasheets. 3. Lack of training on NEMA symbols. Solution: Seek industry-specific training courses.
FAQ: 1. What does the "OL" symbol signify? A: Overload. 2. What are the most common trip classes? A: 10, 20, and 30. 3. What does a manual reset signify? A: The relay needs to be manually reset after tripping.
Tips and Tricks: Use a magnifying glass to examine small symbols. Keep a copy of the NEMA standards handy for quick reference. Take photos of relay markings for future reference.
In conclusion, understanding NEMA symbols for thermal overload relays is paramount for anyone working with motors. These symbols provide a concise language for understanding the relay's characteristics, ensuring proper motor protection and minimizing downtime. From selecting the correct trip class to understanding reset types, the ability to interpret these symbols empowers you to make informed decisions about motor protection. By following best practices and seeking expert advice when needed, you can leverage the power of NEMA symbols to keep your motors running smoothly and efficiently. This knowledge translates to increased productivity, reduced maintenance costs, and a safer working environment. Don't underestimate the importance of these small markings – they hold the key to unlocking the full potential of your motor protection strategy.
Ryan reynolds new cell phone company is mint mobile worth it
From street art to screen unleash your creativity with a font generator graffiti text
Finding peace in the flow prayer times in kuala terengganu


